Tutorial 5 - Adding another Java class to a project
 1 2 3 4
 5
6 7 
This tutorial deals with how to add another java class to your project, how Intellisense learns about the classes you are creating, and how to use the NetBeans "Refactor"
feature.
Step 1: Create a new Java Class
- Select File > New File from the menu at the top
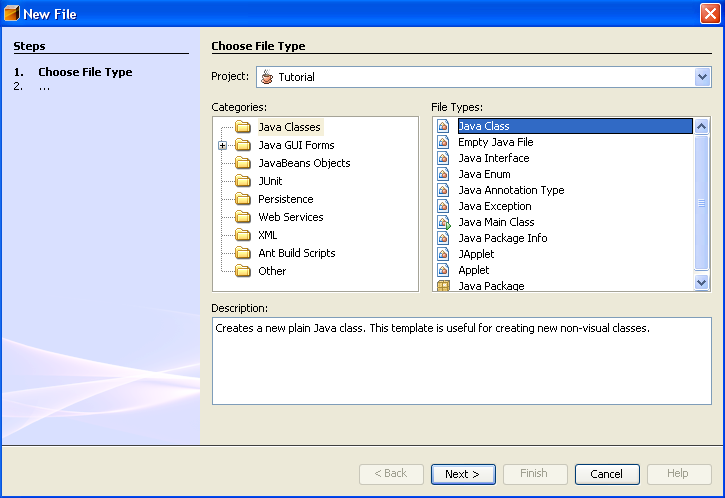
- At the New File screen, select "Java Classes" for Category, "Java Class" for the File Type and click the "Next" button
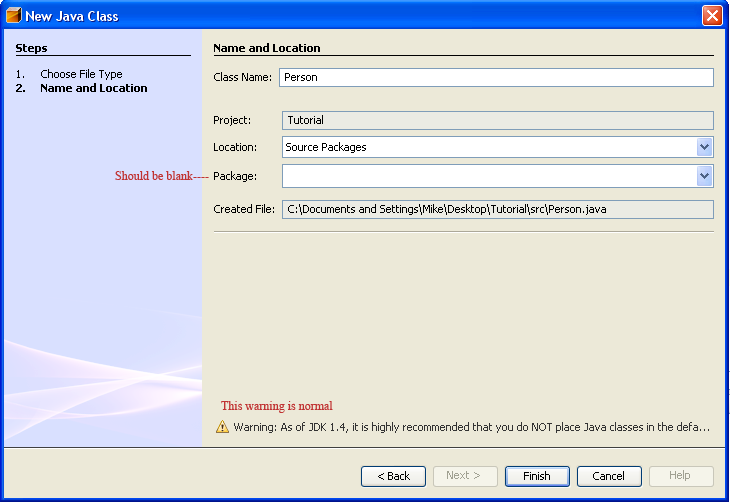
- Name the class "Person" and leave all the other fields alone. Click on the "Finish" button when you are done
- NOTE: The Package should be blank. If it is not, please read the note in Tutorial 3, Step 1. You should also get a warning at the bottom about putting new classes in the default package. This is normal as well.
Step 2: Make the Person class do something
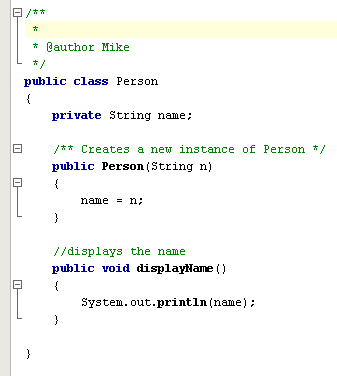
- Lets give the Person class a member variable called "name".
- Lets make a constructor that takes a String and sets the name to be that String.
- Lets also write a method called "displayName" which will just print the name out. The code snippet is below.
Step 3: Using intellisense & auto-complete with the classes you create
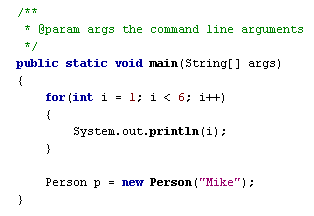
- Lets go back to our Driver class. Since we now have the Person class, lets make some use out of it. In the "main" method of our Driver class, lets create a Person named "Mike". We will just leave the old code from the previous tutorials. A code snippet is below:
- Now that we have a Person instance, lets see what methods we can call on it. On the next line, if you type "p.", you will see a list of methods that are available:
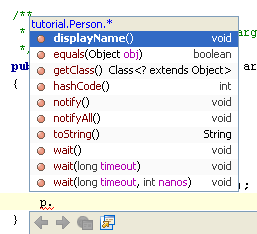
- You will notice that the method "displayName" is listed as the top one. If you press enter, auto-complete will type it automatically for you. All you need to do is add the closing parenthesis and semi-colon.
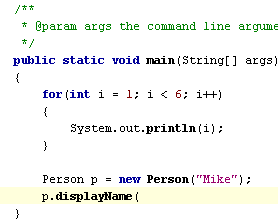
- If we run our program, we should see the output from our old tutorial and the name "Mike" printed to the console:

Step 4: Using the Netbeans "Refactor" feature
Lets say we are not happy with the name we gave the method "displayName" in the Person class. We would like to change it to "printName" instead. This is simple, but one problem occurs: we have to change every place that called "displayName" as well. This is where Refactor comes in.
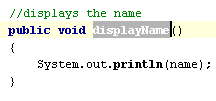
- Go to the Person class and highlight the "displayName" in the method declaration:
- Select Refactor > Rename from the menu at the top
- For the "New Name" field, change it from "displayName" to "printName" and click the "Next" button
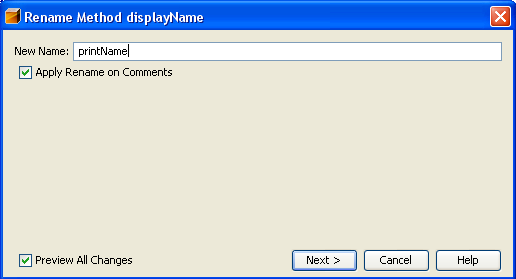
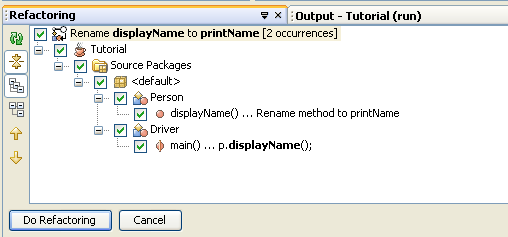
- At the bottom of the IDE, you will notice a Refactoring window has appeared. This is showing you all the places where it will change the "displayName" method to "printName" instead. Click on "Do Refactoring"
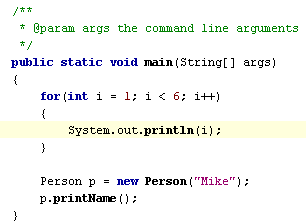
- If you go back to the Driver class, you will notice that "p.displayName" was automatically changed to "p.printName":
You can refactor methods, variables, and other things as well. If you want to rename a class, you MUST use refactor because there are many dependencies on class names.
Now that you have a working program, read about how to submit your homework in the next tutorial.


